Custom Terminal Setup - Kitty + Ranger on Ubuntu 24.04
- Published on
- • 20 minutes read

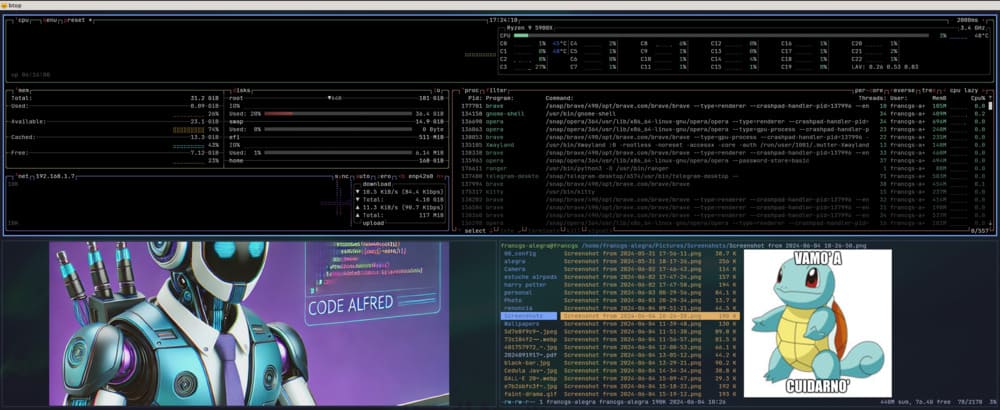
Are you tired of a dull and slow terminal? Want a beautiful, fast, and highly customizable terminal experience? This tutorial walks you through setting up Kitty as your terminal emulator and Ranger as your file manager, with image previews, custom fonts, and the popular Tokyo Night theme.
sudo apt install kitty
Create a file named kitty.conf in the Kitty configuration directory:
~/.config/kitty/kitty.conf
Paste the full configuration content you want here (including font settings, scrollback behavior, and mouse mappings). You can use the example you already have or trim it to your liking.
# Kitty configuration
font_family      JetBrainsMono-ExtraLight

font_size        11.0

window_border_width 2pt
window_margin_width 2
window_padding_width 1

background_opacity 0.9

# BEGIN_KITTY_THEME
# Tokyo Night
include current-theme.conf
# END_KITTY_THEME
Create a new file in the same config folder:
~/.config/kitty/current-theme.conf
Paste the following content:
# vim:ft=kitty

## name: Tokyo Night
## license: MIT
## author: Folke Lemaitre
## upstream: https://github.com/folke/tokyonight.nvim/raw/main/extras/kitty/tokyonight_night.conf


background #1a1b26
foreground #c0caf5
selection_background #283457
selection_foreground #c0caf5
url_color #73daca
cursor #c0caf5
cursor_text_color #1a1b26

# Tabs
active_tab_background #7aa2f7
active_tab_foreground #16161e
inactive_tab_background #292e42
inactive_tab_foreground #545c7e
#tab_bar_background #15161e

# Windows
active_border_color #7aa2f7
inactive_border_color #292e42

# normal
color0 #15161e
color1 #f7768e
color2 #9ece6a
color3 #e0af68
color4 #7aa2f7
color5 #bb9af7
color6 #7dcfff
color7 #a9b1d6

# bright
color8 #414868
color9 #f7768e
color10 #9ece6a
color11 #e0af68
color12 #7aa2f7
color13 #bb9af7
color14 #7dcfff
color15 #c0caf5
Download JetBrains Mono ExtraLight, extract and copy the entire contents of the ttf folder to your system fonts folder:
sudo mkdir -p /usr/share/fonts/JetBrainsMono-ExtraLight
sudo cp -r JetBrainsMono-ExtraLight/ttf/* /usr/share/fonts/JetBrainsMono-ExtraLight/
Edit your ~/.bashrc and add:
alias icat='kitten icat'
alias s='kitten ssh'
Then reload it:
source ~/.bashrc
sudo apt install ranger
Copy default config files:
ranger --copy-config=all
Edit the ~/.config/ranger/rc.conf file:
set preview_images_method kitty
set preview_images true
Then reload again:
source ~/.bashrc
ranger
You should see image previews (via icat) in the preview pane and enjoy a fully themed, fast and modern terminal experience.
By following this tutorial, you’ve set up a powerful and visually stunning terminal environment using Kitty, Ranger, and JetBrains Mono with the Tokyo Night theme. This setup not only improves readability but also adds features like image previews, aliases, and a modern UI to your daily workflow.